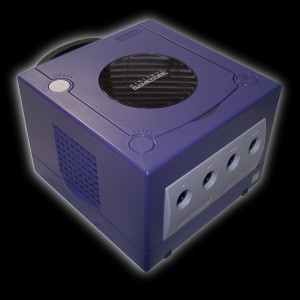
The Nintendo GameCube
|
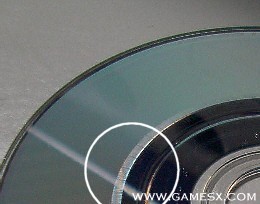
Here it is - not the RGB mod we were hoping for but the next best thing - an import mod so we can all play the plethora of US released games on our Japanese cubes. Thanks to Planet GameCube for posting this. Don't forget the other GC stuff - the ring around the center of the disc, a review of the system itself over on AtariLabs, and the GameCube Guts page, which should come in handy when you're disassembling the unit.
Please discuss this page here.
|
|

|
This is the main board, as seen from the video port side. Locate the ATI graphics chip, and the row of three jumpers as shown.
|
|
|
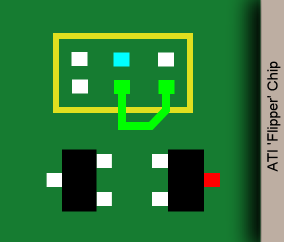
Here's a closeup of the jumpers you need to work with. These jumpers are very, very tiny, and this mod shouldn't be attempted by a soldering novice. There are three jumpers. Ignore the one on the left, and remove any jumpers on the center or right pair. Connect either of the two points joined by the green U-shaped trace to one leg of your switch, and the other to the blue or red point, depending on your GameCube model.
North American GC: use Red
Japanese GC: use Blue
|
|

|
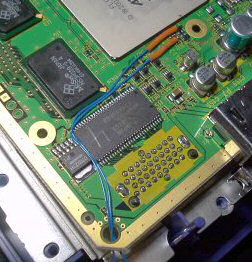
North American GC
This pic shows the two wires connected to the appropriate points. To make the left wire easier to attach I scraped the green coating off the U-shaped trace. Use very thin wire (I used single-strand copper for this mod) and BE CAREFUL not to pull the wire after it's attached, you can peel the circuit off the board! Attach one wire to the U, and another to the transistor as shown.
|
|
|
Japanese GC
This pic shows the two wires connected to the appropriate points. To make the lower jumper pad more accessible, I scraped the PCB trace attached to it until the copper was revealed, and heaped some solder on it. Attach one wire to it, and another to the capacitor as shown.
|
|
|
Here you can see how I routed the wire. There's a convenient hole in the corner nearest the jumpers, and you can see the wire coming out through another convenient hole in the side. From there, run it around the front and through yet another convenient hole underneath the connector for the control panel.
note! Be sure to leave lots of extra wire! It's easy to make it shorter later, but you can't make it longer if you guess the wrong length!
|
|
|
Using all the skill you can muster (And a dremel, if you've got one) cut or drill a hole for your switch in the end of this Serial Port cover. The advantage to putting it here should be obvious: you're not going to cause serious damage to the shell if you screw it up. Also, in the unlikely event Nintendo actually releases a modem or other device for this port, you can simply move the switch. I suppose that second point is a con, rather than a pro... Ah well.
|
|
|
The finished product. Here's the switch in all its glory. Be sure to leave some extra wire length inside, in case you need to move the switch later, or want to open the unit up again.
|