Table of Contents
X68000 CZ-600C Floppy Drive Capacitor Replacement
The original capacitors in the X68000 floppy drives will, given enough time, dry up and cease to function properly. This is not a problem unique to these drives, most electrolytic capacitors will similarly fail eventually. This guide will show you how to replace capacitors in the original X68000 floppy drives. Some of the techniques shown here will apply to other FDD as well.
Be warned that your problems may not lie only in the capacitors, but it's a good first start.
Only low profile capacitors are used in these drives so make sure that you buy the smallest you can get. When replacing capacitors, be sure to note the polarity.
Here's the parts list: (You can click on pictures to see location and polarity)
Main drive PCB:
- 10uf 16V x3
- 100uf 16v x4
Floppy spin motor PCB:
- 22uf 16v x5
- 10uf 16v x1
- 1uf 50v x1
- 1uf 50v BP x1
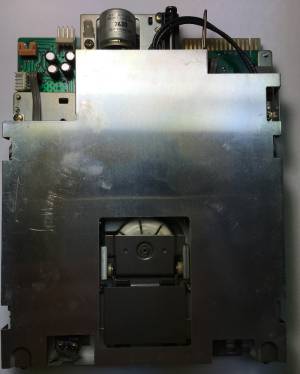
Here's a picture of the FDD out of the X68000 you will be working on:
Take Apart the Floppy Disk Drive
Follow the following set of pictures as you take the FDD apart. Be careful as some of these parts are old and fragile. Keep all the screws in a safe place. After the capacitors have been replaced, you will do the reverse in reassembling the drive.
NOTE: You can click the pictures below to see full size close-ups.
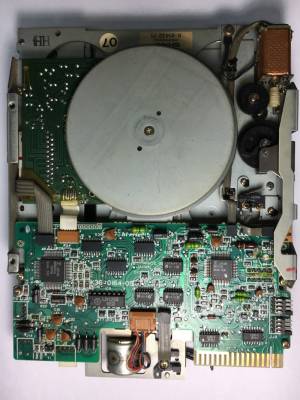
- Start by removing the 4 screws holding the main drive PCB in place. Remove the 4 ribbon cables + drive motor connector as well:

- On the other side of the drive, remove the 4 screws holding the FDD shield and remove the shield:

- After the shield is out of the way, you will need to remove 3 ribbon cables. Afterwards, remove the 2 FDD head cable connectors. Note the order. In this example, you'll see the ribbon closest to the middle of the FDD has a pink line drawn across it at the factory:

- At this point, the main drive PCB has been removed. Next you need to free the floppy spin motor PCB. Remove the 6 bolts holding the floppy eject mechanism. Note one of them has a spring and washer (don't lose it):

- Pull the ribbon cable out from the other side, and start rotating carefully the floppy eject mechanism away from the FDD body. Pay close attention on how everything is assembled. You will need to put this back together afterwards. In particular, there is a lever with spring on the top right. Note the spring location.

- Finally, you exposed the 3 bolts holding the FDD spin motor PCB. Unscrew them:

Capacitor Maps
Now that you freed the 2 PCBs with the capacitors on them as shown below. Note that the FDD spin motor PCB has no polarity marking as well as a single capacitor that is bipolar.


Final assembly
Reverse the order shown above to put the FDD back together. It is wise to do other maintenance at this point as well, including:
- remove any dust and dirt from all the parts
- use isopropyl + qtip to clean all the old grease where you see it
- clean the FDD head with clean qtip dipped in isopropyl
- lube the FDD gears using 100% white lithium grease as well as under the FDD head arm (this reduces friction and makes the drive work better)